Translate

Friday, January 15, 2016

Leah's 3rd Birthday Blankets

As I mentioned in my last post I'm making blankets for all of the nieces and nephews this year.  The first birthday is today.  Miss Leah Jane is turning 3!  I made a blanket for her when she was born, so I wanted to make her something else instead. I was thinking of making some clothes for her dolls who are always naked. She is so adorable playing with her babies and loves them so much!  But, when I asked her what kind of clothes she wanted she insisted they not have clothes.  She said she wanted a "Rainbow from the Sky Blanket."  I don't know exactly what she meant by that, but this is what I ended up with.

"Rainbow from the Sky Blanket"
16.5" x 10"
Since the "Rainbow from the Sky Blanket" was so tiny, I decided I would make a bunch of blankets that she could wrap up her naked babies with.

This next one matches the one I made for her when she was born so she and her baby can match.

Replica's of Leah's Baby Blanket 22" x 14"
Inside size 12" x 20", 36 dc per row, 34 rows
Her favorite color is pink so for the rest I just made some different things using mostly pink.

Baby Blanket 16" x 11"
Inside size 12" x 8", 25 dc per row, 21 rows
Baby Blanket 20.5" x 10"
Inside size 15" x 10"
Pink Granny Squares Baby Blanket 18" x 12.25"
Inside size 10.5" x 21"
Leah opening her birthday blankets.  I LOVE that smile!
Someone else had the same idea I did and quilted some baby blankets for Leah's Birthday.  These babies are laying on top of the quilts and you can see some of the others on the right of the picture.  All the babies will be very comfy!  I love that she used the box my blankets came in as beds.

Wednesday, January 13, 2016

Minion Hat- "Kevin"

Happy New Year!  I was asked by a co-worker to make a "Kevin" minion hat (two eyes, one chunk of hair standing up in the middle).  Since I had previously made so many, and got to the point I could whip them out fairly quickly, I thought it was no big deal so I agreed.  Turns out, it was a big deal.  I couldn't remember how to make them, couldn't find the pattern, once I found it and made it, it wasn't the right size, I couldn't remember how I altered the pattern to make it work, and the problems seemed to go on and on.

The first batch of these hats I made weren't minion hats, they were hats in whatever color yarn I had that I donated to a homeless shelter as part of a church service project.  I didn't care what size the hats turned out because people are all sizes and children need hats too, but it gave me the opportunity to experiment risk free with sizing, which also required no obligation to store the sizing details in my long term memory. I also have a tendency to inadvertently add stitches as I go, so some of the best sized hats ended up that way on accident.  A situation not easy to duplicate.  After several variations of undoing several rounds of work, and sometimes starting over completely, I probably made the equivalent of four or five hats to produce this finished product...

Kevin!
It looks a little goofy standing up by itself not being on a head.
It's very telling of this project that my name tag ended up crooked in the end :).
More than make a post about this particular hat, I wanted to write a post that included some tips so that I don't have to start from scratch again if I ever want to make another hat.

Tips:
  • For starters, click here for the pattern.
  • Round 1 says "work 10 sc in ring" but I prefer more.  For this hat, I did 12 which was acceptable, but I think I would have actually liked one or two more.  By doing 12 in the first round I ended up with 36 sc that I was working around in a circle (I'm not sure if there was supposed to be 35 and I added an extra stitch, or 37 and I dropped one) but in any case I was working with 36 for most of the hat (somewhere toward the end I finished with 38).
  • I used the gold #5 crochet hook.  I don't know what I used before, probably the pink one (not sure the number), but this is the first time I really noticed the different results from the size of hook.  The gold hook has bigger stitches, so fewer rows are required for a full hat (which was nice since I made it so many times), but I actually prefer the look of the pink hook better.  The stitches are tighter and the hats feel thicker.
  • My favorite hat has 42 stitches at the end (keeping in mind 42 stitches with the pink hook, not the gold one).  This is probably too big for most people because it doesn't have the snug fit associated with beanies. I really like the loose comfortable fit though because it covers my ears and doesn't slide up with movement.  Future hats should err on the side of bigger.
  • Put the black band for the goggles higher than you think you'll need.  Maybe rows 9 or 10 instead of 13 (these are pink hook estimates).
That's it for now and should help me the next time I do this project.  You will be seeing more crochet from me this year as I've set a goal to make blankets for all of the nieces and nephews for their birthdays (20 total).  Some of them already have blankets that I made for them as babies, so those kids might get something else, but I'm determined to have this be a home made year, so we'll see. I also have a portrait in progress so stay tuned for lots more posts.  The first birthday is this Friday and the blanket is already done!

Tuesday, December 22, 2015

Nutcrackers

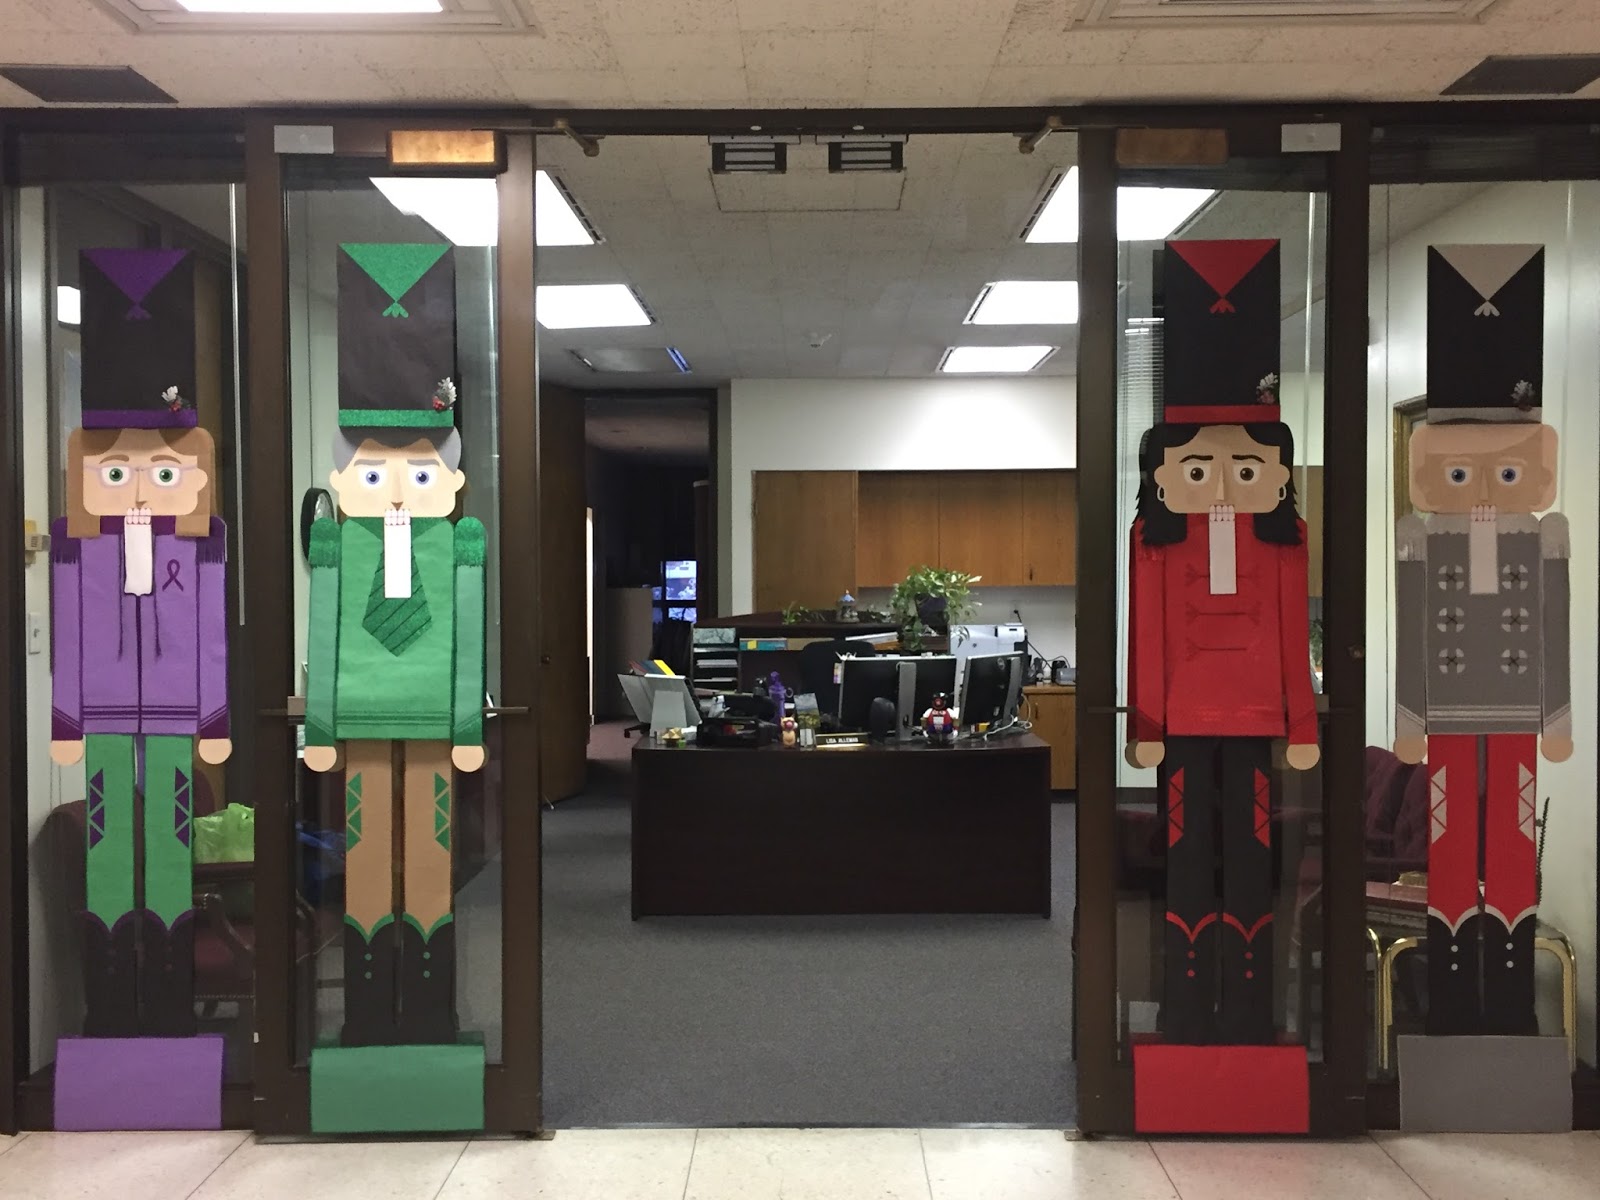
Time for the annual Door Decorating Contest at the School District.  Here is our entry for this year:
The Front
The Back
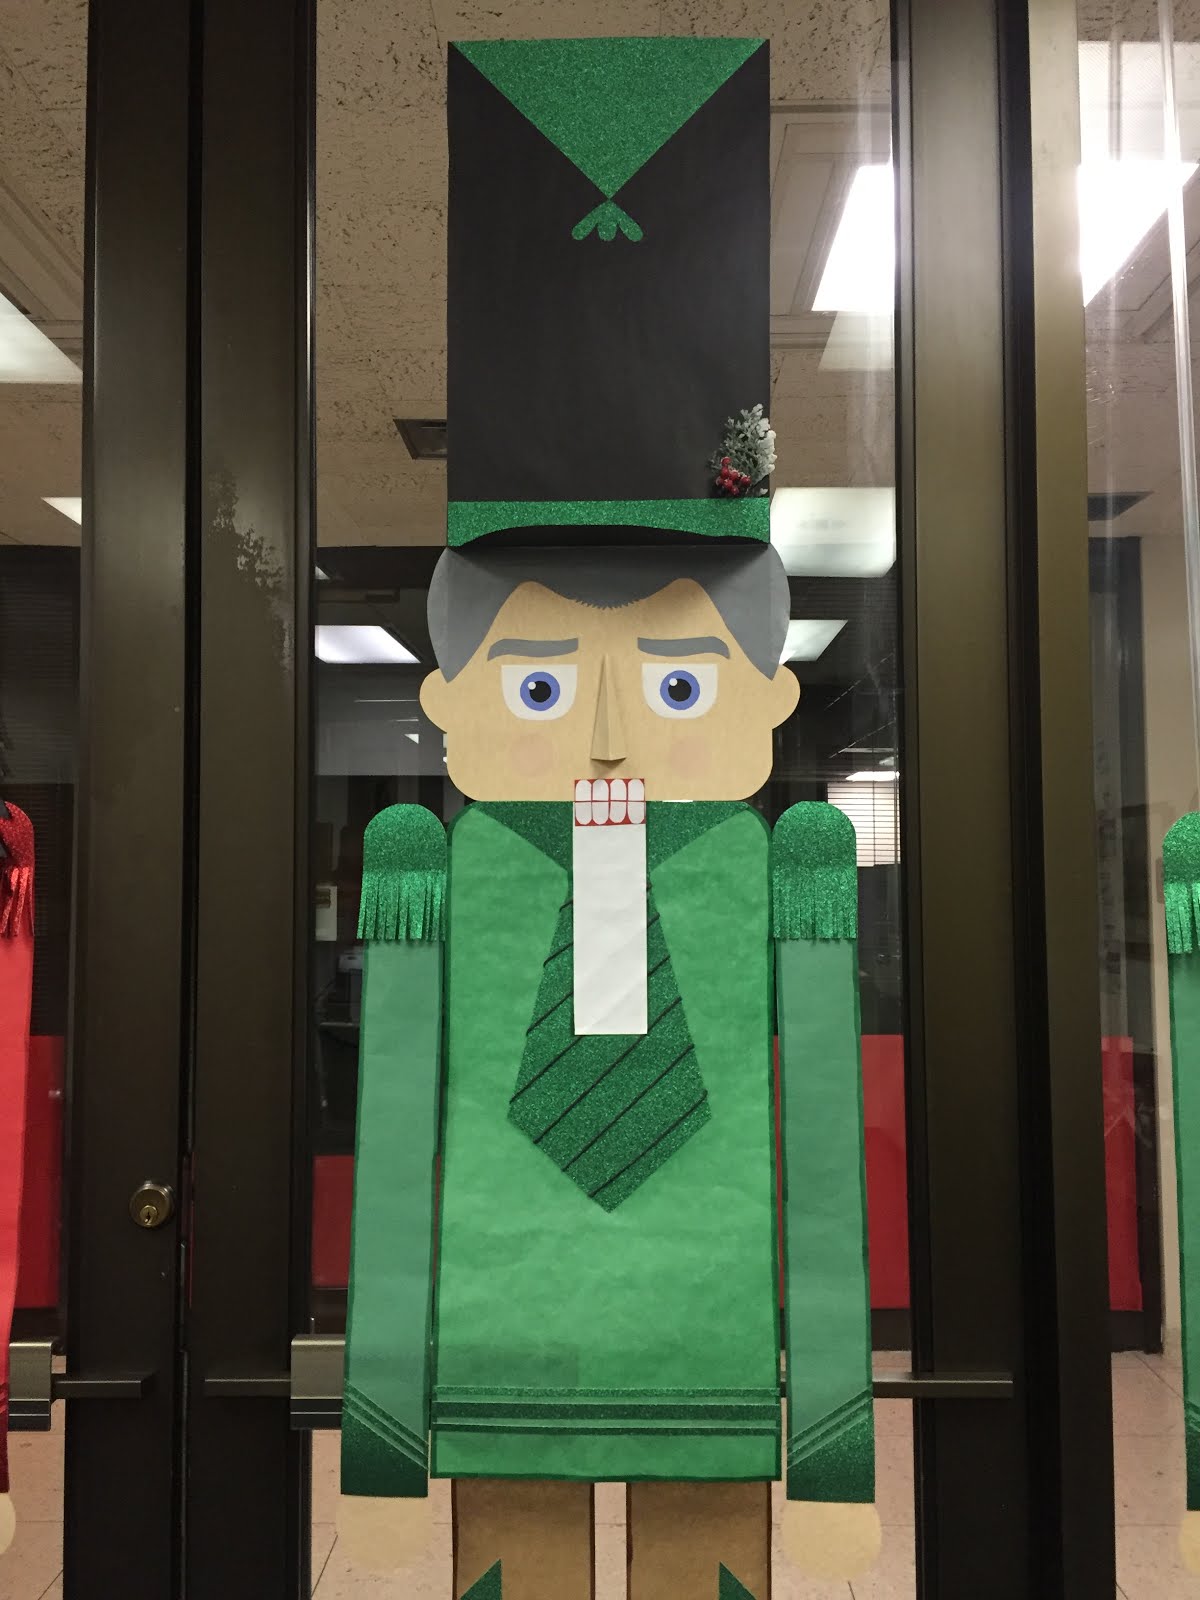
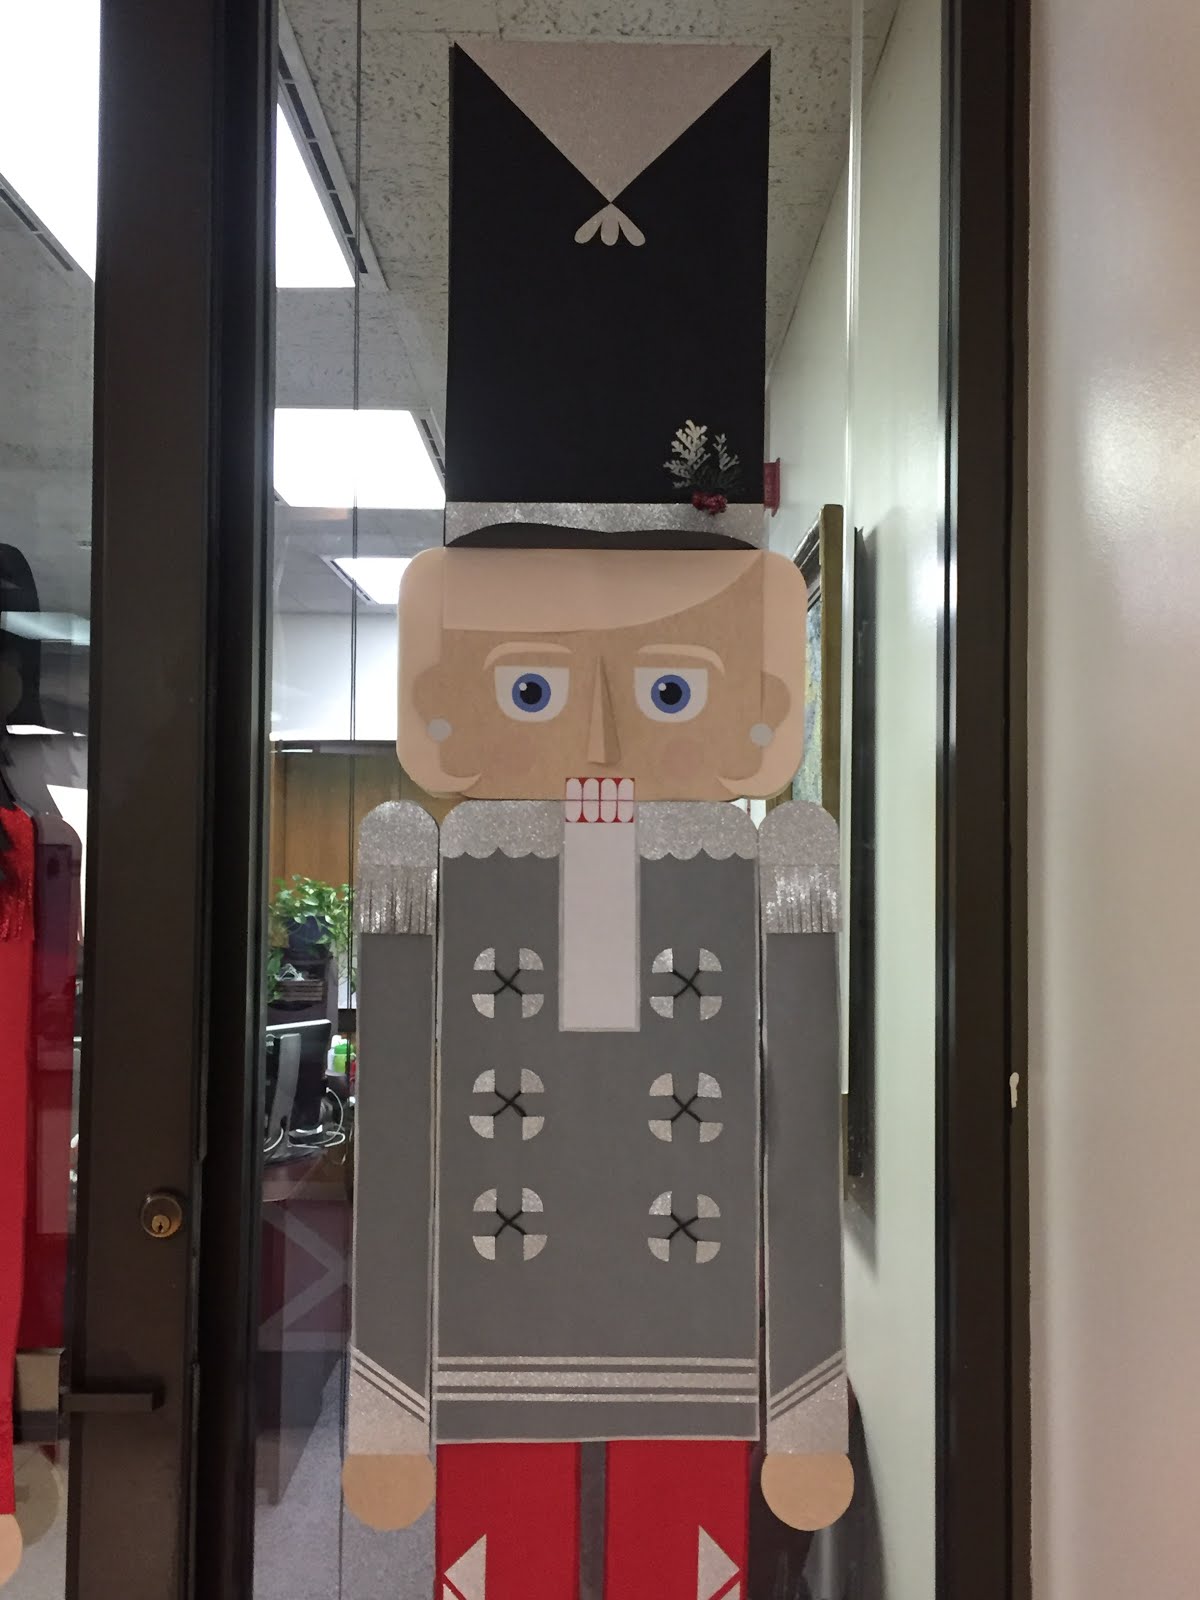
The hair, eyebrows, eye color, and accessories on each Nutcracker represents one of the people in our office.
The Superintendent
The Policy and Legal Services Director
The Legal Assistant/ Office Manager
Me, the Superintendent's Assistant
It's hard to tell from the picture, but my hoodie has an actual zipper that works!  It's also a little hard to tell that each hat has a 3D rim on it (you can tell it's there from the shadows).  This was a super fun project, but ridiculously labor intensive.  I kind of wish I had calculated the number of hours spent working on this because it would have been massive.  Basically all of my lunches and whatever work time I could sneak in while others were in meetings or out of the office and I could still get my work done since September!

Here is Riley standing in front of them with the door shut to give you an idea of how huge these are.  Riley is exactly 5' tall.
So, how did we fair in the contest?

Second place.

I won't lie, I was bummed.  Our door really was the most labor intensive of them all and the only reason I think we didn't win is people didn't understand that these were all individually designed, cut and glued by hand with lots of measuring and precision.  I had a ton of people ask me where I bought these, or who printed them.  I wouldn't have voted them for 1st place either if I thought someone had just bought them off a shelf and hung them on a door (of course how they thought any store was selling the exact right size to fit our doors perfectly and that represented the people who work in our office escapes me).

I did have a small fan club of people though who understood, and even before the voting, repeatedly stopped by to marvel at my design, take pictures, and tell me how much they loved it.  I even had one guy stop by and bring me treats to tell me I'd been cheated when we didn't win.  It was pretty funny how passionate people got.

So, without further ado, here are pictures of the winners:

1st place went to the Printing/Media Department:
Even though these bricks were printed they get major points for the 3D roof/awning, and the saran-wrap icicles. Also the window of the inside made from a photograph of the inside was very clever and funny!  

This is where it gets tricky to tell what they did from the pictures.  From the bricks on the lower left hand side of the picture, you can see that this is positioned right next to the door and they utilized the wall space to have a Christmas tree.

This is a second door on the right side of the Christmas tree. They created a "store window" by building a structure on the inside to support it.
Here is a close up of the inside of the store window.  It has a much better Wow Factor in person.
3rd place went to Assessment/Evaluation.  You may remember they won us last year with their Star Wars Door.
My favorite part about this one is the wood paneling.  It isn't real.  The real wall is white brick.  Nicely done!
These didn't win, but were some of my other favorites:
I don't know why "Flaky Friends" made me laugh so hard, but I loved this!
Very clever incorporating Alice in Wonderland with a Winter Wonderland.
And never has door decor represented the department so well.  This was the Information Technology Department that did "Name that Tune" in binary code. Ha ha ha!  LOVE IT!!!!

Wednesday, November 18, 2015

Beauty and the Beast Shoes

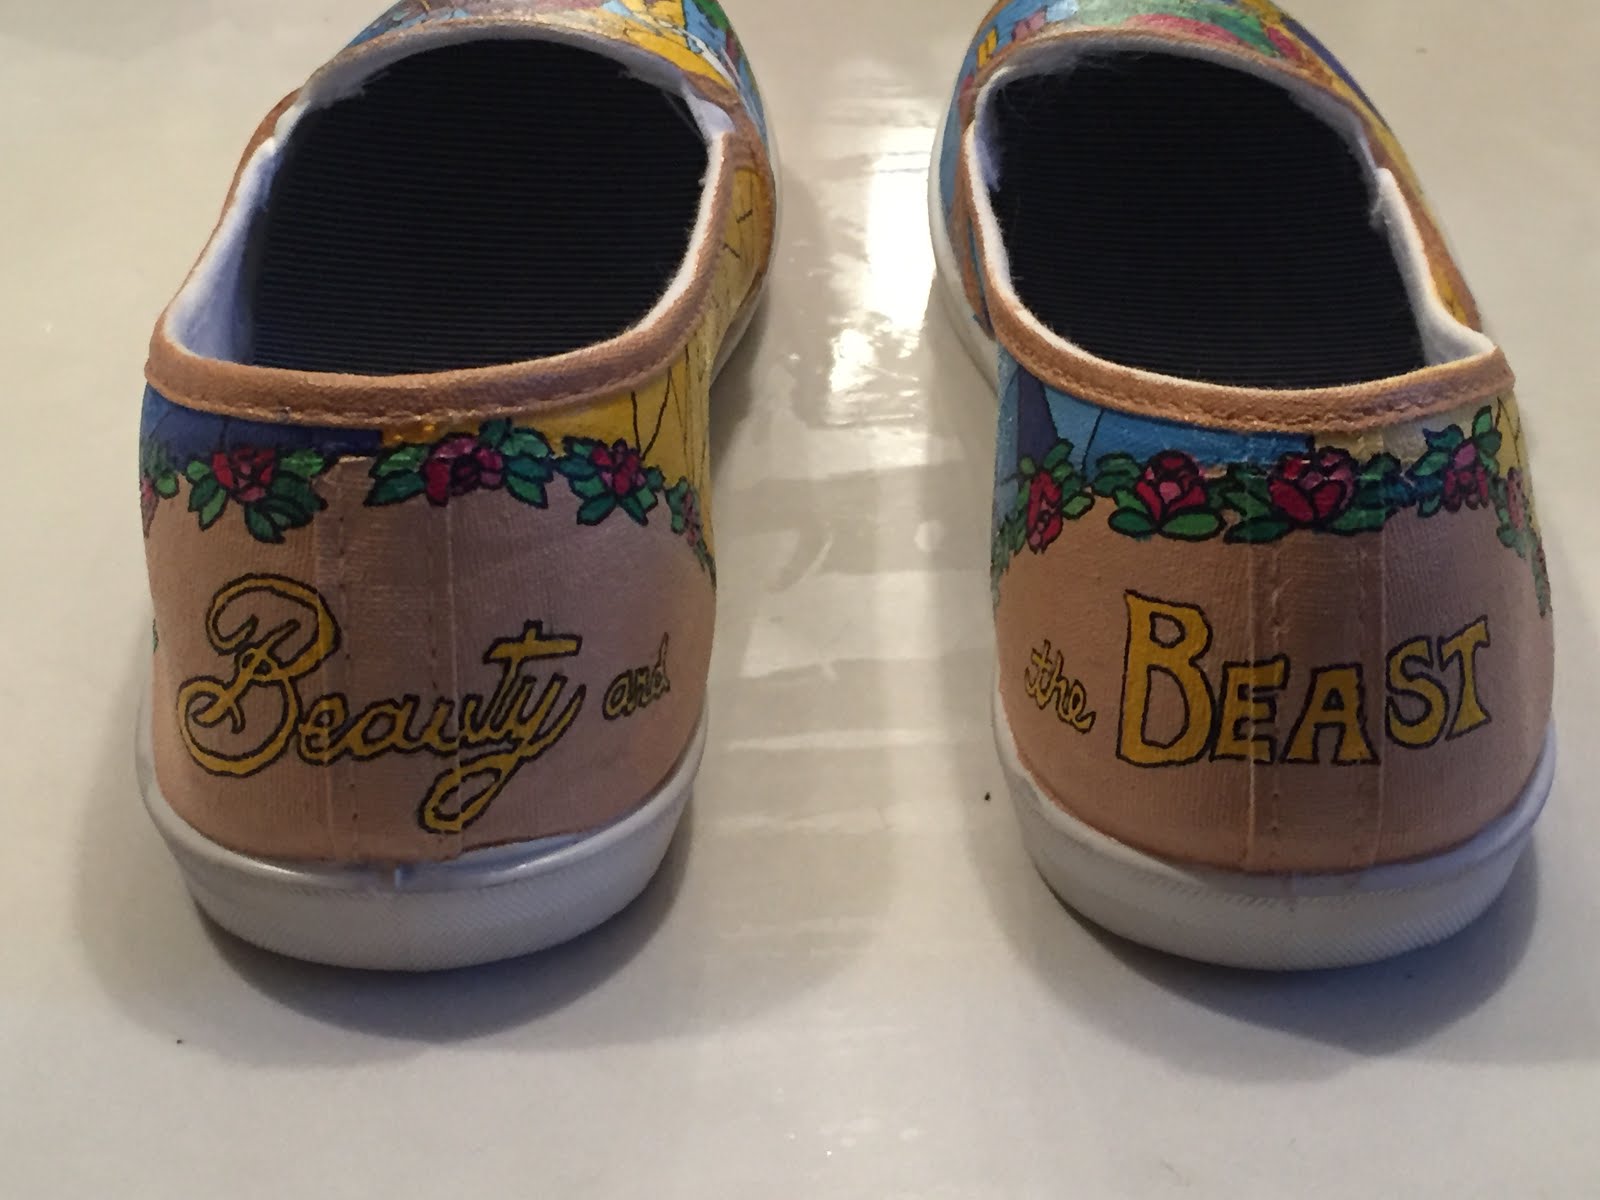
Last night I finished painting these fun shoes for Kristin.  We are going to Disneyland next week and I thought it would be fun to dress the part.


The problem is these were super cheap shoes that really didn't support the walking required at Disneyland, and there wasn't time to break them in anyway.  As cute as they were, it wasn't worth the blisters. They'll still be fun to wear around town though.

Before
During
All the painting is done, now time to outline.  It's amazing how big of a difference that made.
The right sides
The left sides
At Disneyland standing next to the real deal in an art gallery.

Saturday, October 31, 2015

Halloween Jars and Costumes

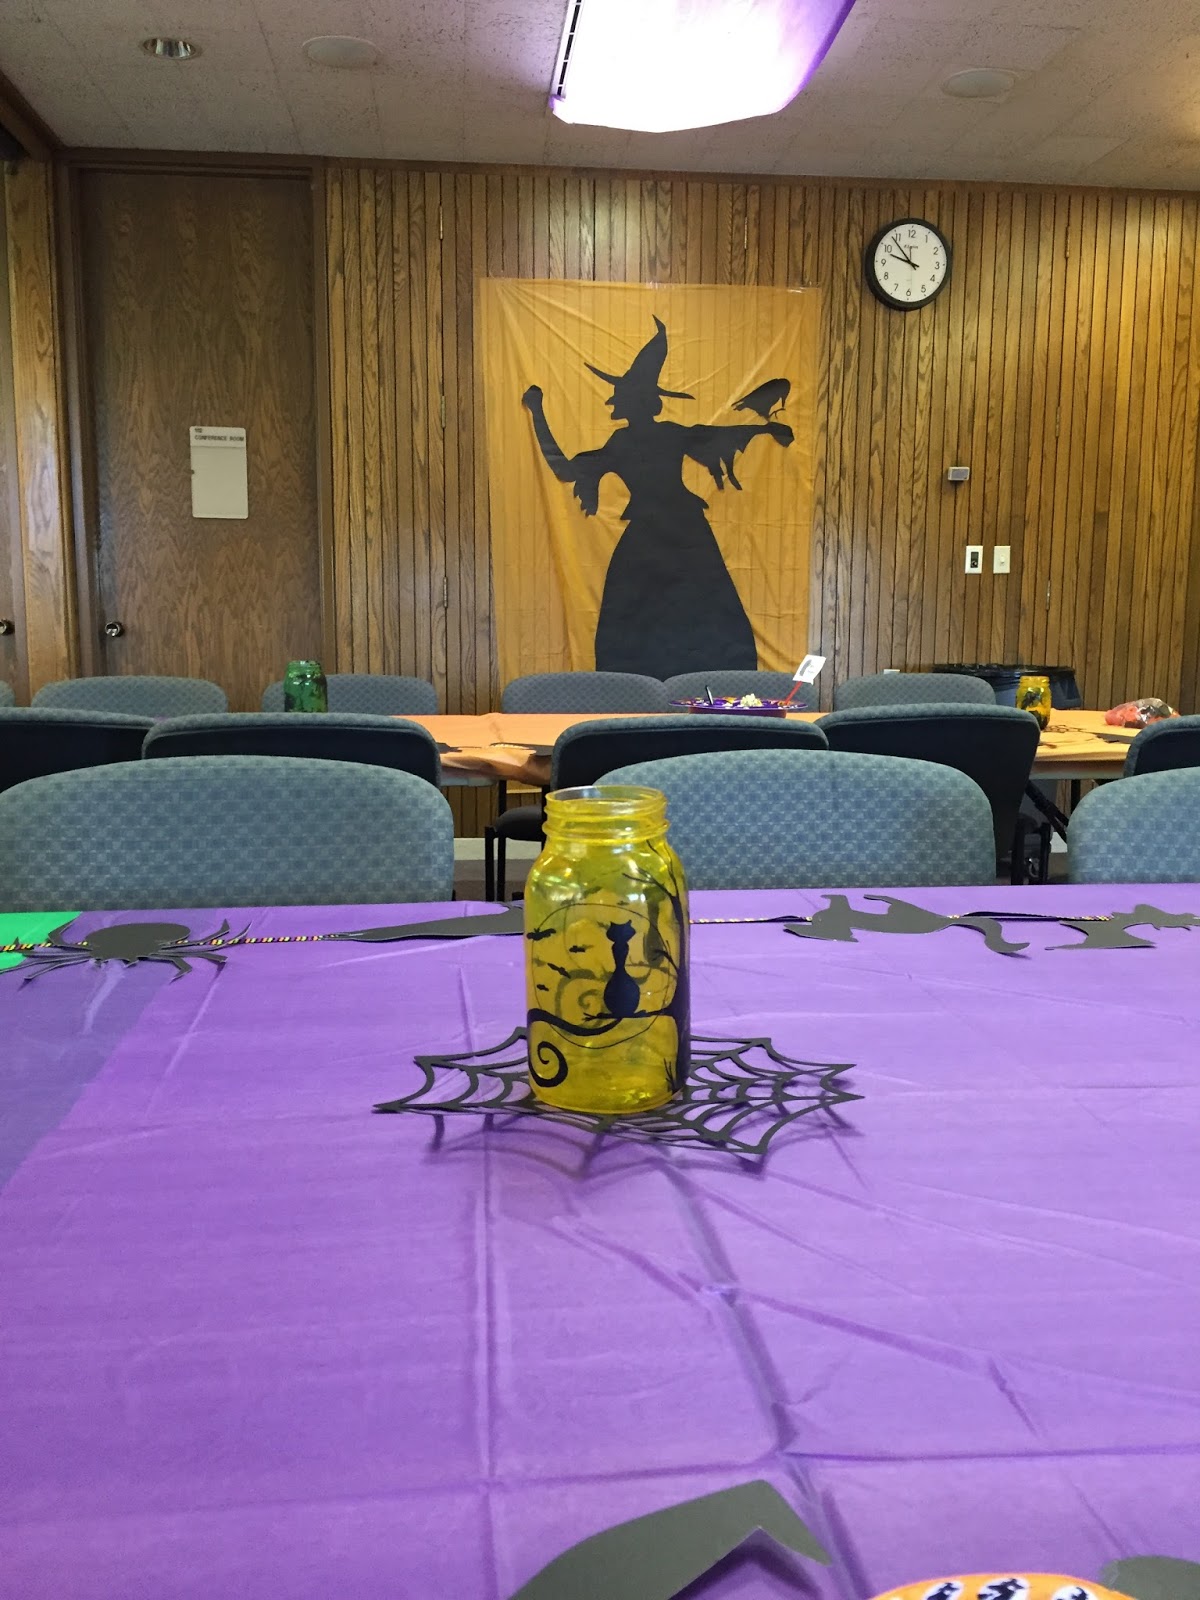
Happy Halloween!  It's been such a long time since I've blogged, and almost a year since I've made anything artsy.  2015 has been a year of creative drought in my life and I didn't realize how much time had passed since I'd worked on a project until I was asked to make centerpieces for the tables at my work Halloween Party.  Getting out some art supplies and just going for it was like breathing fresh air for the first time! I couldn't have imagined how refreshing it would be to make something. I got to the point where I was skipping eating lunch just so I could spend more time during the day painting over my lunch break.  I needed the creativity more than I needed food.  I didn't know that was possible, but I'm grateful to have had that realization.  I may not be the best artist, and the things I do may not amount to anything beyond my own amusement, but it is something that I need to make a priority.  My quality of life depends on it!

So, what were the centerpieces?  Hand painted glass jars that I dyed using Mod Podge and food coloring then painted with a combination of paint and a paint pen (which I'd never used before, but was really fun). The jars didn't photograph really well, but hopefully you get the idea from these pictures.

At first, I was disappointed that I was asked to make the centerpieces instead of the wall silhouettes, but once I found the idea for the jars online I was happy.

This jar was one of my favorites.  The spiderweb coasters were made by someone else and cut out using a Cricut.

This one is the Wizard of Oz.  Hopefully you can tell that the 4 friends are in front and the witch is in the back.  The tea-lights inside didn't photograph well at all, but the effects in person were awesome!

The jars were placed up and down the tables.  There were 17 total, each with a different design.  The theme of the party was "Double Double Toil and Trouble" and had a great witch theme (as you can tell).
I had many great compliments on the jars and ended up giving them all away after the party (missing out on my opportunity to get better pictures of them, which I had planned to do at home).  It's all for the best though.  The whole time I was making them I kept wondering what I was going to do with them after, and didn't want to have a find a place to store them, so it worked out well that so many people wanted one.

I might make more for myself in the future if I want the decor, and since this was the first time I'd colored and painted jars before there was a definite learning curve.  Even though these ended up turning out well, the next ones will be even better!

Riley got into the spirit of Halloween creativity this year too.  For the first time ever I made him make his own costume!  When he was little, I used to make all his costumes, but then complicated family dynamics, lack of time I could spend with him, and other complications always got in the way and for the past many years I've always taken the easy out and bought something.  This year, he wanted to be Link from Legends of Zelda...


He made his own shield and sword and I made the outfit (although he found the instructions he wanted me to use for the DIY hat and ears on YouTube).  I would have had him do more, but time just didn't work out.

He wasn't the most excited about doing this, but I think he ended up loving the end result, and you just can't beat the self-esteem rush that comes from completing a project.  His little helper is my Mom's cat Mo, who absolutely adores Riley.
Here is the finished product.  I was super happy with my idea for the boots.  I cut the leaves of a brown sweater and put one on each leg upside down. It was perfect!
We skipped out on hosting the family Halloween party this year and opted for simpler times by joining up with some cousins for trick-or-treating in their neighborhood.  Here are a few final pictures of the festivities.

Before heading out we stopped by to visit my Dad and Aunt Mary Jo.
We went to a pumpkin patch and corn maze on our way.
Riley playing in the corn.
There was a petting zoo and we got to pet this kangaroo (he's just sleeping).  I was amazed at how soft he was!
Riley's pretending to be a scarecrow in the corn maze.
Finally, we caught up with the rest of the kids.
Hitting the streets!
Princess Sophia, or as Leah says it "Princess Tortilla."
Jeff and Margie rockin' it as Han Solo and Lea
The Jimenez Family completing the circle of life as a bee, flower, bee keeper and honey pot.  So cute!
Of course no gathering would be complete without these two best buddies and a sword fight.
First time Trick-or-Treaters getting the hang of it.
Counting the loot, and a good look at Riley's pointy ears.
It was a very Happy Halloween!